Category: Plant dye processes

01 Feb

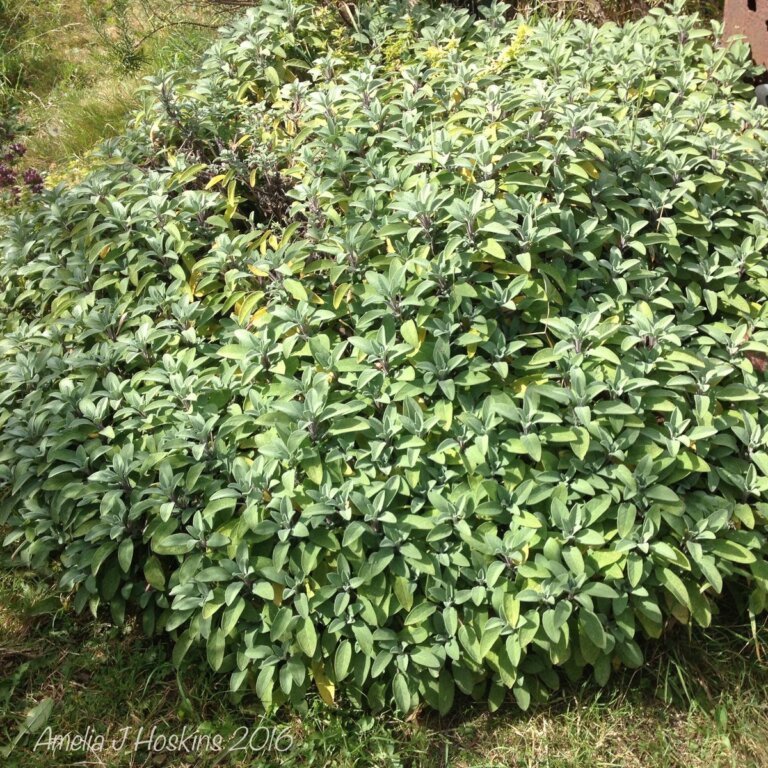
Sage Dyed Silk Triskele Torus Design

Experimental Silk Bleaching and Painting with Plant Dyes

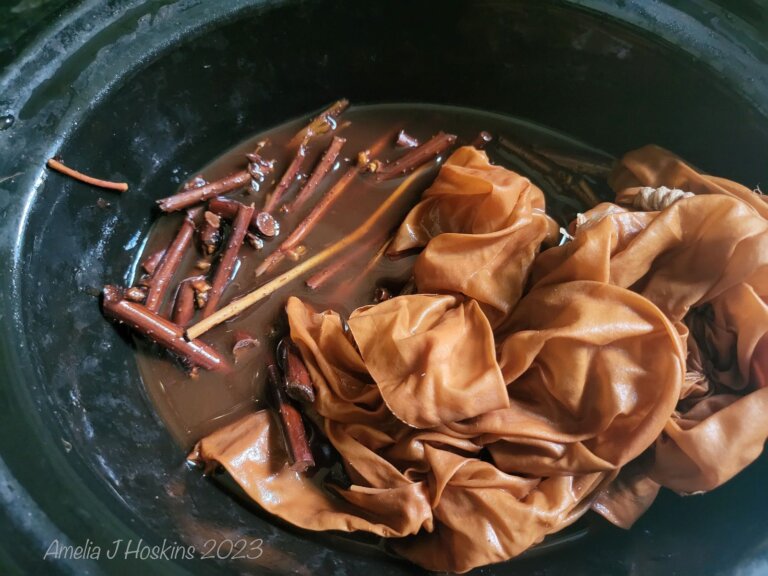
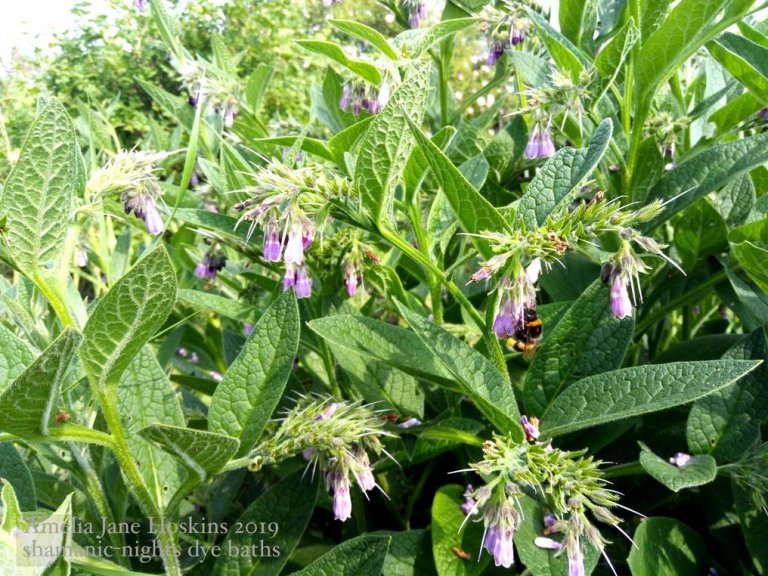
This is my first attempt at using plant dyes (rather than commercial ones) on previously plant-dyed silk.  Silk dyed with rosehips was rather pale, so I over-dyed silk Habotai 10 with sage.  Previous triskele designs done in soya wax  (as resist) were only dull yellow and darker after the sage bath, so I bleached out further, brushing lemon juice around  in rough and larger manner to give vague paler guide.

  • Lemon juice with brush
  • De-colourant (commercial product) thinned with water, applied brush.

Lemon juice was brushed around the linear borders of triskelles, and the tie dyed star-shapes in background.  It seems to have removed the sage, but not the original peachy rosehip, which shows through.  This is a very useful tool to use as design outlines or rough out areas.  It needs testing on different plant dyes and see what colour results.

Lemon juice bleaching looked yellow when wet (sage dye dissolving?).  It produced only slightly paler areas, about 30% less of the ground colour, but gives an outline to follow later.  Triskeles were followed by placing tracing of design underneath silk, and sketching over on the silk with water soluble pens (available in blue and purple). To emphasize paleness, the de-colourant paste (thinned 50/50) was used to give light outlines: to see the whole design, and to allow for colour to be added over.  I iron steamed the de-colourant areas to dissolve.

A new shape - a torus in line form was added.   Light star shapes were originally tie dyed resist at original dying so they are pale in the torus two centres.

At this stage, perfection isn't so important as I prefer to have some unevenness, and some overlapping of layers.  In this instance, the overlapping of transparent torus over the original triskeles is an experiment.  Silk was rinsed in mild soapy water after the ironing/fixing out of the de-colourant.

*. *. *. *. *

OVER PAINTING SILK WITH NATURAL DYES -  Experimental design ideas to practice with dyes

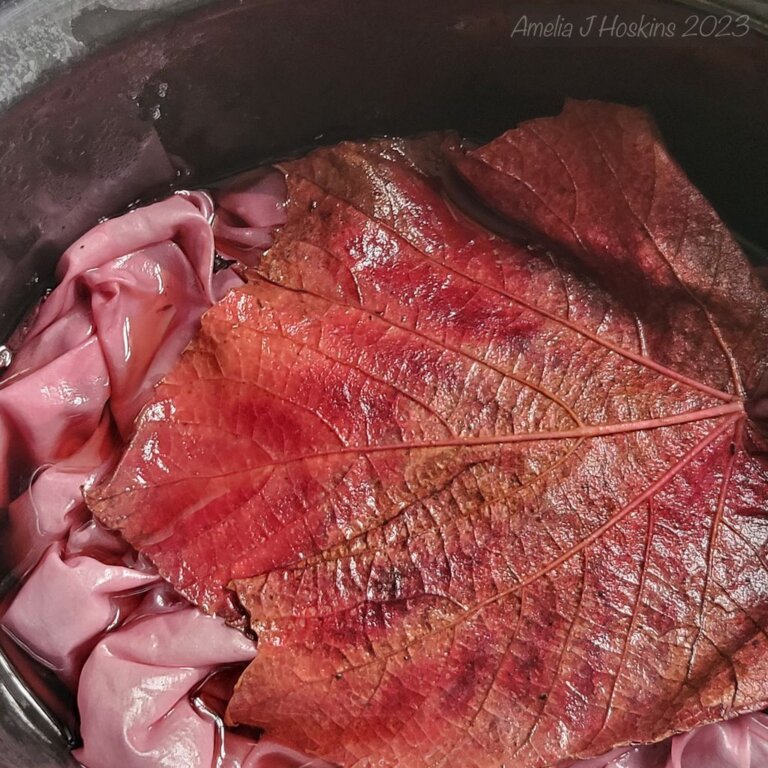
Next, water based gutta was applied by both pipette and brush over the lines around and within the triskeles and the torus.  Gutta plain, and gutta with added dye Madder, Woad and  Mimosa Brown thinned, were used for thin and thicker lines around outside of triskeles.   Madder, woad and mimosa dyes were painted with brush within the outlined design areas.

Lemon juice successfully faded out some triskele colours painted too bright behind the 'torus' area.  A 'ghost effect' is produced.  Angels were placed within the torus ovals, utilising the pale tie-died star forms. De colourant had also been used beforehand to lighten the 'angel wings' area. (After steaming wings went rather yellow, so de colourant needed again).

STEAMING OF NATURAL DYE PAINTED 'TRISKELES AND TORUS ANGELS'

Experimental result from 2 hrs steaming.  About 70% of natural pigment seemed to stay in tact with a faded overall 'aged' effect.  This could work well used in abstract designs, where clear outlines not needed.  The gutta steamed out completely, leaving the dyes behind.   The lines within the torus are quite a good effect.  Madder stayed fairly well, woad quite paler, and gold-brown colours used in the gutta line application seem to have infused the whole areas. Turmeric was painted in some areas around designs, which may have spread out adding an unwanted yellow overall.

Steamed Silk Experimental Design

Strength of colour was lost;  faded effect is interesting and can be utilised for 'antique' designs.

The many different lines of gutta outlines, and infill dyed lines create a subtle interesting effect, even though the brighter contrasting colour outlines are lost.

Madder turned duller, ruddy brownish, and other gold and brown outlines merged into each other.  Woad blue faded to pale. (woad without additive)

Actually a good background for embroidery.

[Photographed in evening lamp light]


De-colourant repainted over areas originally lighter

Due to the loss of colour contrast, I used chemical decolourant discharge paste over some main circle lines and the angels.  I forgot to use it weaker strength and got a yellowish result. The first result was aesthetically better.

  • Some torus rings, triskeles, celtic knots and angel wings lightened in rough large brushed areas.

  • Areas are steam ironed to activate discharge

Coloured details can be added again over top, possibly with synthetic dyes due to the detailed colour needed for angels, bird and lion.  Other discharge pastes may be tried over for this experimental piece.  Eventually I hope the piece will be usable as centre piece to a patchwork quilt.


CONCLUSION:  Natural dyes are good for background areas.

Gutta outlines (to prevent dye spread) were coloured with natural dye, which mostly faded out after steaming.  Their wobbly outlines (created by gutta pipette and nib application), gives an interest better than exact lines.

Lines as feature colour were faded.  MADDER kept colour best in the outlines, and will be useful for silk design outlines.

Coloured brush strokes can be overlaid for intermixed tones.

15 Jan

Sage dyed silk

Silk dyed with Rosehips in 2023 was very pale, so I decided to over dye with sage; leaves and twigs from a large autumn picking from my allotment.  The first soaked piece (above image) produced a good deep ochre-gold; the second soaked piece produced a paler more yellow ocre.  Both colours are subtle and acceptable for adding painted designs over.  Currently Celtic Triskele designs, with additions.


Sage-dyed silk sample square showing the difference between sage ochre colour and Indian Bean Tree/raspberry cane dyed silk behind.  The sage twigs and leaves were added to the pigment weakened dye bath.

Shibori stitching was experimented with again (as with the raspberry cane dyed silk);

stitching around the circles in the Triskele design, pulling tight to prevent dye sepedge.

Shapes were also painted in hot soya wax, so dye bath had to be barely warm to prevent melting of wax.

Silk Over-dyed with Sage

First soaking of predyed silk (rosehips) in sage dye bath.

Areas of design of Triskeles had been painted with soy wax heated resist.  It always leaves a 'grease mark' or a darker dyed area; maybe a mixture of both.  Shibori stitching for resist circles also used.

2nd soaking of silk in sage dyepot - pale ochre with dirty effect

Gutta was also used as resist but areas have turned bright yellow after rinsing and ironing. This may be concentrated dye areas, or a reaction with the gutta.

The design is vaguely apparent and the abstract effect is good.  This effect will be seen behind top painting in colours.

Lemon juice was painted on the design outlines, but it wasn't very clear, so a professional discharge paste was used to give a clearer look to the Triskele designs, for working over.  It worked well enough.

The abstract effect is still in the background, to leave some as is.

Triskele design outlined quickly with brush dipped in discharge paste - mix approximately of 5:3 water-paste is enough to do the job without risk of clogging the fabric (which happened on wool when paste applied 100%).  New natural dye colours can now be added to the design in both yellow and paler discharged areas.  The pale rosehip pink is visible after discharging. This photo taken while paste drying in window.  Dried result is another paler ochre.

06 Dec

Raspberry Cane Dyepot Resist

Silk dyed in pot of previous 'Indian Bean Tree' dye; with added chopped raspberry canes. Canes were heated in slow cooker for some time, and a test square of silk left in cold dye for 5 days, which turned ocre gold.

TRISKEL DESIGNS:  Soya wax used to create resist areas of triskels, prior to dyeing in a previous dye bath which had resulted too pale.  The two design areas traced through with brush of hot soya wax. The original wax imprint is seen in the final result below, after raspberry cane dyepot.  Wax may have been too hot, as it left a dark mark; see lemon bleaching below.  [Triskel design taken from Celtic Spirals book, enlarged]

RASPBERRY CANE RESULT

DESIGN: Two large triskelles on cloth.

  • Over-dying pale rosehip-dyed habotai silk. Finished colour mid tone terracotta.
  • Circular areas of triskelle designs were stitched around and gathered up tight.
  • Cold dyed for over 24hrs, the resist technique worked reasonably well, some circles clearly have the paler rosehip colour showing due to the blocking off of die penetration.
  • The soya wax design outlines had left an imprint darker, whereas I wanted pale contrast, so I followed the design again with lemon juice.

Over-bleaching with Lemon Juice

Soya wax circular outlines (used as resist) had left a darker mark (grease?) or darker dyed?   I used lemon juice to brush around the triskel design circles, which after drying and washing out, left a lighter outline, like a weak bleach.  A good experiment, which may bleach better on different dye stuffs.  The lemon itself was used as a 'bleach pot' with an end cut off to dip in.


Lemon juice bleaching result.

Several tones lighter, but not enough.

Useful as a test.  Could be used as a created texture in backgrounds.

Last bleaching - with professional chemical discharge paste, mixed 50/30% water/paste.

A much lighter result and clearer outlines.

Pasted on with stiffish brush, the outlines are clear, giving a good base for adding coloured details to the design.

Silk design will be used as a centrepiece in patchwork quilt, (pinned here to cotton background).  New added details of silk painting will echo the colours in the patchwork prints.  Quilt design development will be linked to as a new post.

20 Nov

Silk and Wool Indian Bean Tree Dye

Bright Pink leaves collected

Indian Bean tree red leaves

Bright Pink leaves in dye pot

Pink pigment quickly absorbed

Pink silk washed in rainwater

Tree has large heart shaped leaves which turn cerise, and dark red.  Found fallen on the path in early November.  The dye pigment is released by slow soaking in rain water, but changes to brown if boiled. (produces similar brown colour as sycamore leaves produce).  Pink is released into fabric in cold water.

Silk soaked in alum for mordanting: then soaked overnight in red leaf water.  Pigment was rapidly absorbed immediately, and turned deep pink overnight.  Washed out in rain water.  When hanging in air, starting to dry, it turned silver grey.  Finished result is a very good silver, good to coordinate with other grey fabrics.

Silk rinsed result deep pink

Indian Bean Tree  - Dye results:

PINK-SILVER on silk : GREEN on wool

After drying, pink silk turned silver; evenly dyed.

Indian Bean Tree - Steam Pressed Leaves

DISCOVERY:  Red Indian Bean tree leaves soaked COLD with fabric produces silver on alum mordanted silk, green on wool pre-dyed with hawthorn, and if used HOT steamed, gives brown textures onto Tutsan dyed silk.

EXPERIMENT:  Steam printing leaves on Tutsan dyed silk

  1. Steam press red leaves (underside up) through protective piece of scrap cotton onto silk.
  2. RESULT:  Red or reddish-brown outlines of leaf veins.  Not worked each time.  Leaves need to be rain water wet.
  3. Paint leaves with old cider vinegar. Position over silk.  Fold silk over double, sandwiching leaves.
  4. Steam press over leaves areas, pressing hard.
  5. RESULT:  Brown outlines of leaves; appears burnt effect from vinegar. [good for paper printing].

EXPERIMENT - SOYA WAX RESIST - Ferns on Wool

Fine wool was previously dyed in Hawthorn bath (second soak): with splodgy rust marks needing disguise.  A good opportunity to experiment with resist techniques.

  1. Fern leaves laid on, wool length folded over
  2. Melted soya wax dabbed with stiff paint brush over the fern shapes.  Some red Indian Bean leaves placed in spaces.
  3. Cloth folded rectangularly into flat piece.
  4. Soaked overnight in cold bean leaf dye bath (after refreshing with more red leaves first).
  5. On opening parcel, pink dyed area seen [subsequently turns grey , then green]
  6. Wax washed out, and pressed out with brown paper, then washed again.
  7. Wax is sticky on wool fabric.

SOYA WAX AND FERNS EXPERIMENT RESULT - MOVES TO GREEN

Feint imprint of fern in centre-right, from soya resist after washing out.  Ferns also produce dye showing russet fern shapes in places.  It would work with a darker overdye and suit silk better, as wax is more difficult to remove from wool.  Final colour was grey green, (now become lime green after various washings to remove wax.) More techniques are needed as the wool piece is still obviously patchy, needing disguise. (see over-designs below).

Experimental painting with natural dye mixes

Grey green wool developed to a brighter lime green after further washing in laundry liquid.  Blotchy green coverage suitable for designs overpainted.  Triskele design adapted from Adrian Meehan's 'Spiral Patterns', 12 fold division of circle - 'The Hitching hanging Bowl'  item c.650 AD.  Centre Nigella seed pods from own drawings adapted from own photographs.

Dye powders mixed in pond water and simmered to dissolve.  Half a jar of water, level Tblsp or less dye powder, level Tbsp soda ash.  The soda ash likely made the colours tend towards brown, e.g. Mimosa, Logwood.  Madder turned darker red rather than orange-red.

Madder + soda ash.  Logwood + soda ash.  Turmeric.  Mimosa (1) + soda ash + oak gall = warm brown. Mimosa (2) + soda ash + woad = warm beige (not the lilac possible with Mimosa).  Woad (1) pure.  Woad (2) + soda ash = greeny blue. 


ANTIFUSANTS

Logwood and Woad dye jars were mixed with 'No Flow' to prevent colour bleeding. I also had dabbed the whole fabric with 'no flow' with a natural sponge.  Madder was mixed with Epaississant gum ('Se melangea la couleur pour lui enlever son fusant') also to prevent dye spreading out of desired shapes, which worked well, as all red is contained.  Blue lines were able to be applied finely, as was the logwood; both with an antifusant added. Mimosa had no antifusant added and bled out of design area; seen around the seed pods in centre.  Brown bleed-out areas were bleached with lemon juice afterwards see in above image. Conclusion: half a tsp of antifusant can be added to half full dye jar to prevent bleeding.

Lemon juice was brushed around centre circles to bleach lighter where the Mimosa brown had spread too much.

UNSUCCESSFUL - Colours were not steamed, so washing out removed most of the colour.  (Wool must be steamed to fix the dyes, just as silk is. I normally paint with steam fix dyes and wanted to try the natural dyes without steaming.  Iron steaming might have half worked).  Mimosa and logwood colours still remain embedded though feinter.  The feint pastel colours are attractive in their own right, but will be merged into the fresh painting.

WOOL PAINTING RECOVERY - Adding discharged designs again

Discharge paste 'De Clourant' was mixed with warm water, about 50% water/30% discharge paste.  (Weaker solution due to a test showing full strength goes yellow on the green dyed wool!).  The weaker strength works fine when steamed, and does not leave any thickness on the wool surface.  Design shapes of Celtic Triskeles are roughly traced with water soluble pen, then bleached out by applying mix with rough brush marks as the basic outlines of triskeles.  (quickest way to re-establish the areas).

REPAINTING WITH NATURAL DYES  - Madder, Woad, Logwood, Mimosa (jar mixes)

Fine wool held still with masking tape, over a lightbox perspex sheet before applying gutta-dye lines and infill-dye with brush.

Finished painting of triskeles on fine wool scarf

GREEN WOOL SCARF AFTER STEAMING TRISKELE PAINTING

Slightly disappointing result, but was expected.  Background original green (Indian Bean Tree)  turned slightly more gold (olive); also changeable in different lights.  The aspect of appearing brighter gold-green, or duller olive-green is interesting.  Previous painted errors were disguised well.

Madder dye -  A ruddy red remained well, but paler.   Logwood dye - Aubergine brown paler.  Mimosa - brown paler.

Woad dye - first mix very pale blue; second woad mix with soda ash added, looked green in jar, but stayed darker blue after steaming.

STEAMED COLOURS

Many of the gutta drawn outlines with dye added disappeared, but they worked well, preventing dye spreading outside of design areas; even on this very open weave, see-through fine wool.

Dark blue thin gutta outlines turned brown.

Woad was extremely pale, except for a 2nd woad mix with soda ash added, which looked dark green in jar, but steamed prussian blue.

CONCLUSION -  Plant dyes work on fine wool, but these were on a green ground.  White or paler colours might produce stronger dye colours.

31 Oct

Hawthorn Comfrey St Johns Wort wool and silk 2023-24

Hawthorn 'May blossom' in full bloom with rare magenta Salsify (normally yellow) growing up through.

Autumn FORAGING and DYEING TIME using plants in my allotment

Hawthorn - Comfrey - Tutsan St. John's Wort

Hawthorn berries:  the Hawthorn tree has grown considerably since it seeded itself about 5 years ago.  The amount of blossom in May ensured there would be many berries, which turned bright red by August, but by late October when I got to pick them many were gone.  Previous Hawthorn dyeing was from berries near different rivers. can be compared.

Dye bath is not exhausted after three lots of dyeing, so still has potential for multiple dyeing and to produce a good stock of pale gold silk or wool backgrounds, which is very useful for painting on.  It can be modified with iron for duller tones, or sycamore for more russet darker tones.  This time of year sycamore leaves are plentiful on the ground.

COMFREY LEAVES collected

Comfrey leaves are plentiful in summer.  See previous Comfrey dyeing post.  By autumn, three plants had sprouted new leaves after earlier ones had frizzled away from heat and rain.  They soon brown off in winter so I picked a deep basket full of them all.

  • Soak leaves overnight, pressing as many leaves down into large jam pan as possible.
  • Heat to soften and add more as they soften down. (from a large picking).
  • Boil and simmer for some hours, until leaves mushy
  • Remove leaves; cool liquid before adding wool or silk.

Fine wool cloth was dyed first, soaked overnight, without mordant.  Silk was dyed secondarily, soaked from cooled dye bath, and achieved the same ecru colour.  Notice the colour results are identical for wool or silk, whereas with Hawthorn berries, the colour results are different between fine wool and silk.  RESULTS below after 24 hour soakings


Lace dress wet from comfrey dye bath.

Third fabric to soak pigment.

It looked green, but dried grey; only appearing 'green' in photographs.

TUTSAN berries, (EURASIAN ST JOHNS WORT) Hypericum androsaemum 

Used for the first time as I had not seen this plant in books.  The berries produce a good light orange gold on silk, without mordanting.

Both black and red berries were soaked overnight, then boiled and simmered, until skins broke and they became soft.  Plant stuff removed and Habotai silk soaked in liquid in slow cooker, on warm for a while, then cooled overnight.

Secondary dye piece of lace summer top: Lace appears to be cotton and soaked up the dye.  After several hours the lining was still whitish, (photo above wet) so presumed polyester; but after 24 hours, it was just about the same colour as the cotton lace, so it may be viscose or silk organdie.  (felt like organdie).   More pigment still visible in dye bath to be used for another piece.  Used berries in photo.

Comparisons below of wet cloths: Tutsan dyed silk (left), and Hawthorne dyed fine wool (right)

Bundle steaming - petals and leaves - on Tutsan dyed silk

Textured antique background for painting over

  1. Laying dried geranium petals, dried daffodils, red antirrhinum petals and other purple flowers, and  on silk.
  2. Wrap around 1 inch wide strip of cardboard; roll around; make into bundle ring and tie with twine.
  3. Suspend bundle over dye bath pan.  Steam for an hour.
  4. RESULT:  'Antique' effect mottled brown and dull pink, with yellow from the daffodils. Motifs repeated in stripes, the width of the cardboard.
  5. Can be tried with any petals and seeds and leaves on any pastel shade to give textured effect.

26 Jun

Hawthorn Berries Three Rivers Dyed Silk

Hawthorn Berries 1 - River Taw

Berries from Tarka Trail foraging trip along River Taw found by ditch and field growing through hazelnut and willow trees with briars and nettles.

Hawthorn (1) - Dye Bath Process

  • Soak berries for 2-3 days.
  • Boil then simmer for 1-2 hours.  Add water and re-simmer if evaporates.
  • Mash berries, remove pulp from dye pan.  Cool to hand hot.
  • Soak silk in dye bath pot overnight or for two days.
  • The longer soaked, the darker and stronger the colour.

Steeping in dye bath

Silk absorbs dye colour immediately, but some hours of soaking will deepen the tone.  Move silk occasionally to ensure all parts even

1st silk can be left in a bowl to dye stronger overnight, while keeping back some dye liquid to soak a 2nd piece, which will have a paler result.

Hawthorn Berries 2 - River Otter - Dye Process

Soak berries and simmer as Hawthorn (1).  Two silk samples were added to dye liquid when cooled and soaked in a wide copper pot for a day and a night. One was cream. The other was dull pale grey (failed woad dyed piece) which resulted in a browner result. (Colour mixing: grey + hawthorn = brown)

Comparisons - Rivers Taw - River Otter berries

Taw berries result is golden.  Otter berries result is dull fawn.  Unknown whether the different river soils affected the dye colour, or if the copper pot had an effect, which is likely.

Hawthorn Berries 3 - River Exe - Dye Process

Hawthorn Berries River Exe Sessions1,2,3,4 give 4 colour variations

Silk 1 - Lime green.   Silk 2 - Medium mauve.   Silk 3 - Silver.  Silk 4 - Pale peach

Fascinating variations obtained by use of mordants, or washing out methods, or how fresh or old/exhausted the dye bath becomes.

Exe Berries - Ahimsa Silk 1. Mauve turns Green

Large long piece of silk soaked a few hours in pre-mordanting Alum beforehand.

Good Mauve result.  Washed out in tap water, with added soap. Turned GREY, then gradually GREEN!  (Far left)

Was it the tap water?  Was it the soap?

Exe Berries - Ahimsa Silk 2.

Two dress top shapes. NO premordant alum.

Steeped 24hrs in remainder dye bath pink sludgy liquid.

Washed out in tap water - stayed a medium MAUVE. (presume due to no alum).

Exe Berries - Ahimsa Silk 3.

One long silk piece with a hem.

Placed in previous dye bath (1. and 2.)

Turned mauvish, but dried out SILVER! (Right)

Exe Berries - Ahimsa Silk 4.

Silk pre-mordanted with Alum and Cream of Tartar.

Cider vinegar from pre-soaked apple peels added to dye bath.

Placed liquid and fabric in copper pot.

Result overnight - pale peach.

11 Nov

Silk dyed with Comfrey leaves

Comfrey leaves give a cream or light beige colour, good for painting on.  Adding iron, gives a dulled greyed mushroom cream.  Comfrey leaves get mushy after boiling.

Alum is a standard means of pre mordanting fabric, to help dye absorption.  Soaking in soya is another.  Alum dissolves in water, before silk is added and soaked for an hour or overnight before dying.

I used this dye session to experiment with shibori: stitching through layers with embroidery skeins, wrapping thread tightly at intersections.  It worked but the result was too pale to notice any difference where the dye resisted.  Iron was added to the dye bath after first pigment had taken up.

Silk looks dark when wet, after iron water added to dye bath, but dried many shades lighter.  Good as a pale mushroom colour.  Shibori stitching was diagonally across weft and warp.  Pale dyes dont give the contrast seen on darker dyes.  I used only cotton thread, which did not resist much dye stuff.  Soya wax could have been brushed on the diagonal lines, to give a slight resist.  Thicker waxed thread ought be tried.

Plain comfrey dyed portion of sample

Darker comfrey + iron dyed section sample

Adding iron to comfrey dye bath turns grey green, and leaving silk submerged longer, results in a very good khaki or green-gold colour.

16 Sep

Alder Tree Cone Dye

Alder cones in Exeter

Cones form on lower branches of the alder tree, first greenish, changing through to brown by late summer. Usually reachable just above head height.  Often seen laying on grass around the base of the tree, clumped on sprigs.

They have good keeping qualities when box full collected.

Produces a pale earthy beige; very useful for painting on to.

Alder Cone dye result on Habotai silk

15 Sep

Walnut Husks Dyed Silk

Walnut Husks Dye Process

  • Walnut husks were soaked for several days before boiling up and simmering until liquid was very dark brown.
  • Remove husks and decant liquid to bowl.
  • Add wet silk pieces. I used Ahimsa silk.
  • Agitate frequently then soak overnight
  • Silk takes up the brown dye bath quickly but keep turning and agitating occasionally while soaking. (I don't boil Ahimsa silk as it would roughen surface) Soaking is adequate for obtaining a reasonable colour.
  • A secondary dying of another piece of Ahimsa silk produced a lighter shade of the brown.

There is a lot of pigment left in the dye bath which can be stored in jars or used for additional fabrics.  Fill to brim to avoid mould forming. It could also be used to add to jars of cream/gold dyes to strengthen tone.  At this stage it would be good to investigate what might be added to the bath, to change the colour of what pigment is left.  I was tempted to add some madder dyestuff for a dark red (purchased, not foraged), and this remains to be tested.

Silk Samples of Gold Variations

Walnut dyed silk is the darkest obtained so far of the beige and golds range, turning out to be a light coffee brown/bronze colour.  It might have gone darker still on Habotai silk.  The Ahimsa silk used, is cotton-like in feel, thicker, and although absorbs well, slightly slower.

Walnut Tree

Walnuts were found on the ground where they had had been decaying under a walnut tree on Bossington Green, Porlock, North Somerset.

21 Aug

Logwood Dyed Silk

Experimental shibori and batik on Logwood dyed silk - 1st Trial

Logwood (in bought dried form) was found to easily produce a very deep violet dye on Ahimsa silk.  Note: Less dye stuff would produce lilac and mauves.  Shibori stitching outlining butterfly showed clearly in white where dye penetration was resisted.

Batik wax originally painted on the silk was overcome by dye, remaining strong aubergine.  To create a contrast to bring out shapes, I outlined in transparent gutta the shapes intended in the design (to be coloured). I used craft 'fabric bleach' to brush on some areas, such as banana leaves.  A second steaming produced the intended shapes in a lighter aubergine, which would be interesting to explore further.

Colour added to simple images copied from a textile, as experiment.  This piece was unfortunately burnt in steaming (water pot went dry), and was cut into strips and used in another garment.

__________________________________________________

2nd Batik Experiment

Double stitched outlines of images, as shibori test.  Batik wax painted quite heavily onto ahimsa silk, with daubing stiff paint brush, to create a cellular texture.  The shibori threads were pulled tight before dying.  Washing out, the wax had held.  Ironed over wax several times with strong brown paper to absorb wax, then rubbing off the bees wax in warm soapy water.  Texture remained to start painting on.

2nd Trial result produced a pleasant textured background to overpaint on.  Fabrics were chosen to coordinate, and use as a colour guide.

Rectangular design was a simple test with the batik, creating a usable textured background to over painting with brighter colours.  This rectangle was used in a dress Butterflies and Pansies  panel front.  Flowers were also embroidered.

Images copyright Amelia Jane Hoskins Please email for use permission.